
 EN
EN  FR
FR  DE
DE  KO
KO  ES
ES  SV
SV  AR
AR  DA
DA  CS
CS  IT
IT  JA
JA  TR
TR  PT
PT  NL
NL  PL
PL  FI
FI The safest way to stop ribbon fraying is to choose the finish from the fiber and the end use. Start with a clean cut. Heat-seal only a confirmed compatible synthetic ribbon; use a purpose-made liquid fray stopper after an offcut test; or fold, stitch, or bind the edge when the finish must tolerate handling or washing.
The MEEDEE Ribbon Editorial Team reviewed the method against ribbon construction decisions, purpose-made product instructions, and the product manufacturer’s current safety data.
Use the comparison and troubleshooting checks below to choose a method that controls the edge without creating a new burn, stain, stiffness, or repeatability problem.
Key takeaways
- Do not use an open flame on unknown fiber content.
- Test the exact ribbon lot because coatings, metallic yarns, and blends can react differently.
- Judge both edge stability and appearance after cooling or curing.
- For repeated assembly, document the tool, method, acceptable edge, and inspection frequency.
Certifications: Meedee Ribbon maintains Oeko-Tex Standard 100 (Class II skin-contact), GRS (Global Recycled Standard for RPET products), Sedex SMETA audit, and ISO 9001:2015 quality management certification. See full scope details.
Direct answer: Start with a clean cut, heat-seal only a confirmed compatible synthetic ribbon, test a purpose-made fray stopper on an offcut, or fold, stitch, or bind the edge when it must survive handling or washing.
Copy this approval record into the RFQ file. Keep every checked item on the same revision before releasing the order.
- ☐ Final specification and intended use
- ☐ Supplier feasibility and documented exceptions
- ☐ Sample or inspection evidence
- ☐ Commercial assumptions, owner, decision, and date
- 1 · DefineUse case and written specification
- 2 · ProveSupplier feasibility and sample evidence
- 3 · CompareCommercial assumptions and exceptions
- 4 · ReleaseDecision, owner, date, and revision
Move the order forward only when each gate leaves written evidence for the next. Return an unresolved specification, sample, or quote exception to its owner before bulk production.
Choose the method from the ribbon fiber and end use
Fraying happens when yarns at a cut edge are free to move. The practical fix is to make a cleaner cut, fuse compatible thermoplastic filaments, bind the fibers with a suitable liquid, or mechanically enclose the edge.
| Specification | Quality control | Verification method | Risk to avoid | Buyer action |
|---|---|---|---|---|
| Fiber content | Match the treatment to the confirmed material | Check the label or supplier specification | The wrong method may scorch, melt, or fail | Confirm fiber before selecting heat |
| Finished appearance | Define acceptable color, gloss, stiffness, and edge shape | Inspect a treated offcut under normal viewing conditions | An edge can be sealed but visually unacceptable | Approve the reference sample |
| End-use handling | Test the same folding, rubbing, or washing expected in use | Flex and handle the cooled or cured sample | Fraying may return after assembly | Record the approved method in the work instruction |
Confirm fiber content before using heat
Polyester and some other thermoplastic ribbons may fuse with controlled heat, but natural fibers do not behave the same way and blends can include metallic or coated components. If the fiber is unknown, choose cutting, stitching, binding, or a tested fray-stopping product instead of guessing.
Test on an offcut from the same lot
Use a piece long enough to judge color change, gloss, stiffness, odor, residue, and edge strength. Let it cool or cure completely, then flex and rub the end the way it will be handled in the final application.
Quick comparison: cutting, heat, liquid sealant, and stitching
Use the comparison to eliminate unsafe or unsuitable methods before testing. The ribbon fiber, exposed-edge appearance, expected handling, and assembly route determine which option deserves a sample. A quick indoor decoration may need only a clean enclosed cut, while a washable or load-bearing item usually needs a sewn or bound construction.
| Step | Buyer input | Supplier output | Risk control | Follow-up |
|---|---|---|---|---|
| Sharp scissors or rotary cutter | State whether the edge is exposed or enclosed | Provide a clean-cut reference sample | Check that a loose weave does not reopen | Approve the cut angle and tool |
| Controlled heat sealing | Confirm compatible synthetic fiber and final appearance | Provide a sealed offcut from the same ribbon | Avoid flame, fumes, scorching, beads, and gloss change | Approve the cooled sample before production |
| Purpose-made fray stopper | State handling, color, and stiffness limits | Provide a fully cured treated sample | Check staining, residue, odor, and product-label hazards | Record the product and cure process |
| Fold, stitch, bind, or tuck | Define wash, load, and visible-construction requirements | Provide the finished edge and attachment sample | Prevent loose stitches, excess bulk, or distorted folds | Approve construction and inspection points |
- Confirm the fiber, finish, end use, and acceptable edge appearance.
- Prepare offcuts with the shortlisted tools or products and record the settings.
- Inspect each cooled or cured edge for fraying, scorch, stain, stiffness, sharpness, and odor.
- Approve the safest repeatable result, then keep its sample and work instruction.
For a scheduled assembly run, compare the method’s tooling, labor, curing or cooling time, inspection load, and reject risk before accepting a price or lead time. Review relevant ribbon products with the chosen finish so the quote reflects the actual material and production sequence.
RFQ checkpoint
Send the intended use, ribbon material and width, color reference, artwork, quantity, packing, and delivery requirements for a feasibility review.
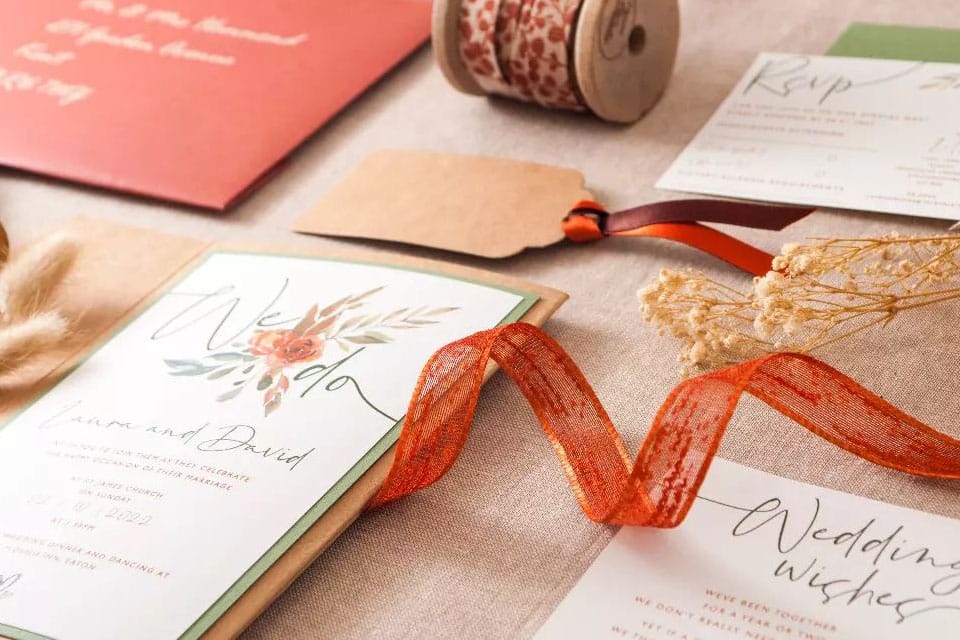
Method 1: make a clean mechanical cut
- Flatten the ribbon without stretching it.
- Use clean, sharp fabric scissors or a fresh rotary blade.
- Make one decisive cut; repeated sawing pulls yarns loose.
- For a decorative V-cut, fold the end evenly and cut from the fold toward the outside edge.
Inspect both faces after cutting and remove only loose surface fibers; repeated trimming can shorten the finished piece without solving a loose weave.
A clean cut can be sufficient when the edge will be folded into a bow center, enclosed in a seam, fixed under a label, or used for a brief indoor event. If the end will be rubbed, washed, pulled, or displayed close-up, approve a more durable finish.
For factory cutting, the buyer should approve the tool, cut angle, exposed-edge appearance, and inspection frequency on the actual satin ribbons or other selected construction. If the edge reopens during handling, reject the clean-cut-only route and test a stronger finish.
Verify the result on the intended assembly and keep the approved cut sample as evidence for the operator and inspector.
Method 2: heat-seal compatible synthetic ribbon
Use a purpose-built hot knife or controlled heat tool for repeatable work. If a brief craft task uses a flame, keep it away from the ribbon and move the cut edge near—not into—the heat only after a successful offcut test.
Low-risk test procedure
- Verify the ribbon fiber and remove flammable clutter.
- Provide ventilation and keep a nonflammable surface and extinguishing method nearby.
- Apply the least heat needed for the filaments to fuse.
- Let the edge cool without touching it.
After cooling, reject any edge that is scorched, curled, sharply beaded, discolored, brittle, or unsafe to touch.
Fire, ventilation, and burn precautions
Synthetic fibers can melt or burn, and molten polymer can stick to skin. Do not let children perform the step. Do not heat-seal ribbon while it is attached to packaging, garments, floral foam, hair accessories, or another flammable assembly.
In repeat production, factory quality control should record the approved tool, setting, motion, and cooled-edge sample. If the material or lot changes, verify the treatment again. The OEM and ODM ribbon development review should include this edge standard when the cut finish is part of a larger assembly.
Method 3: apply a liquid fray stopper
A purpose-made fabric edge sealant can reinforce loose fibers. Prym describes its Fray Check as a colorless liquid for sealing open fabric edges, but its current safety data classifies the liquid and vapor as flammable and warns of serious eye damage and possible drowsiness or dizziness.
Application and curing
- Read the product label and safety data sheet.
- Protect the work surface and ventilate the area.
- Apply a very small amount to an offcut; prevent it from wicking beyond the edge.
- Allow the full stated drying or curing time.
After the full cure, the buyer should check stiffness, color, gloss, odor, rub behavior, and any wash requirement. Reject the method if it creates a visible halo, an unsafe residue, or a finish that no longer matches the approved ribbon.
Safety data and stain testing
For repeat production, keep the current label and safety data with the work instruction. Test the selected liquid on the actual ribbon, allow it to cure fully, then inspect both faces for a halo, color shift, gloss, stiffness, odor, or transfer before approving the method.
See the manufacturer’s product instructions and safety data sheet. The U.S. CPSC art-materials guidance explains why current hazard labeling and precautionary statements should remain part of the review.
Quality control should retain the cured reference and record the product, application amount, cure time, inspection result, and disposition of any stained or stiff pieces.
Method 4: fold, stitch, or bind the edge
Mechanical finishes avoid exposing the ribbon to flame or a liquid edge treatment. They are often the strongest choice for garments, reusable bags, sashes, handles, ties, and items that will be washed or repeatedly flexed.
Sewn finishes for washable or load-bearing use
- Double fold: turn the raw end twice and stitch it flat.
- Narrow hem: useful on wider ribbon or sash material.
- Bound edge: cover the cut with a compatible tape or patch.
- Hidden tuck: trap the end inside a bow center, seam, or assembly point.
Production repeatability
Set stitch length, thread color, seam position, fold allowance, and back-tack method in the approved sample. Add a simple visual limit for loose threads, puckering, exposed raw edges, and uneven hems so different operators judge the same result.
Ask the supplier to show how operators verify fold depth, stitch position, thread security, and exposed-edge coverage. The buyer should compare the first production pieces with the retained sample and reject loose threads, puckering, sharp ends, or raw edges outside the approved limit.
Troubleshoot scorched, stiff, or still-fraying edges
Treat a damaged edge as a process symptom. Identify what changed, correct the method, and verify the new result before more pieces are released.
Symptoms, causes, and corrective action
Judge the finished edge after it has cooled or cured and after the handling expected in use. A defect is not solved if fraying stops but the new edge becomes sharp, stained, brittle, visibly uneven, or unsuitable for skin contact.
| Symptom | Likely cause | Corrective action |
|---|---|---|
| Brown or glossy scorch | Too much heat or excessive dwell time | Reduce heat exposure; switch to a controlled tool or non-heat method |
| Hard sharp bead | Excessive melt concentration | Use less heat and inspect for skin-contact risk |
| Sealant halo or stain | Too much liquid or capillary wicking | Apply less with a finer tip; change product or method |
| Edge reopens | Method is too weak for handling | Use stitching, binding, or an enclosed construction |
| Uneven results between operators | No controlled work instruction | Freeze sample, tool, setting, motion, and acceptance criteria |
Set an edge acceptance standard
Record the method, tool or product, setting or application amount, cure time, and acceptable appearance on the sample card. For repeated production, inspect a defined number of pieces at setup and during the run, and isolate work when the edge no longer matches the retained sample.
Before approving the next run, ask the supplier to document the defect, likely cause, corrected tool or process, and new inspection result. The buyer should release production only after the corrected edge matches the retained sample under the intended handling condition.
In conclusion
Start with the least disruptive method that meets the end-use risk. Make a clean cut, confirm the fiber before applying heat, treat liquid products as chemicals with label-defined precautions, and use a sewn or enclosed finish when handling demands it. For repeat production, the approved edge sample and written work instruction matter more than a one-off trick. Turn the article into a clear RFQ or sample handoff by sending the ribbon specification and end-use risk through custom ribbon solutions when the supplier must include cutting or finishing in its quote. Ask the factory to identify the method, tooling, inspection record, cost driver, and any effect on sample or production timing; the buyer can then approve one reference instead of comparing an unfinished ribbon price with a finished-edge requirement.
Sources reviewed:
- Prym — Fray Check product information
- Prym — Fray Check safety data sheet (12 March 2024)
Frequently asked questions
Can every ribbon be heat sealed?
No. Heat sealing is suitable only for a compatible thermoplastic ribbon after the fiber content and finish are confirmed. Natural fibers do not fuse in the same way, while unknown blends may contain coatings, metallic yarns, or other components that react unpredictably. Test an offcut from the same ribbon lot, use ventilation and the tool maker’s safety instructions, and reject the method if the sample scorches, beads, sharpens, changes color, or develops an unacceptable odor.
Does clear nail polish stop ribbon fraying?
It may temporarily stiffen an edge, but nail polish is not a controlled textile production method and may yellow, stain, smell, crack, or react with the ribbon. For a repeatable result, use a purpose-made fabric fray stopper only after reading its current label and safety information. Apply the smallest practical amount to an offcut, allow it to cure fully, then inspect appearance, flexibility, residue, and performance during the actual handling expected in the finished item.
What is the best method for bulk ribbon assembly?
The best method is the one that passes an approved edge sample and can be repeated safely by the production team. Define the ribbon material, tool, cut angle, sealing or stitching process, acceptable edge appearance, and inspection frequency before release. Run a small trial with the intended operators and packing method, then keep the approved sample and written work instruction. If the ribbon specification or supplier lot changes, verify the treatment again instead of assuming the previous setting still applies.
Commercial Terms Note
MOQ, pricing, and lead times vary by specification. Each project requires individual feasibility review based on material, quantity, complexity, and timing. Confirm current terms via our RFQ form or email [email protected].
Next step: Send the intended use, ribbon material and width, color reference, artwork, quantity, packing, and delivery requirements for a feasibility review. Send Specs for Review.
Key facts: 20+ years of OEM and ODM ribbon manufacturing | Xiamen, China | 9 ribbon families | 3–100 mm widths | OEKO-TEX Standard 100, GRS and ISO 9001 certifications plus a Sedex SMETA audit
Related Resources
- Custom Ribbon Manufacturing Services — Pantone color matching, width customization, printing methods
- OEM & ODM Development Workflow — From requirement review to production
- Factory Tour & Capabilities — Xiamen facility overview
- Quality & Certifications — Oeko-Tex, GRS, ISO 9001; Sedex SMETA audit
- Request Quote Today — Share material, width, color and quantity for a quotation
Editorial note
Prepared by the MEEDEE Ribbon Editorial Team and reviewed against current product, customization and sourcing information supplied by Meedee Ribbon Inc. Commercial terms such as MOQ, sampling and lead time should be confirmed for each specification.