MEEDEE Ribbon is a B2B ribbon manufacturer in Xiamen, China, with 20+ years of OEM and ODM ribbon manufacturing experience.
Expert Review
This article was reviewed by the MEEDEE Ribbon editorial team.
View full profile
Certifications: Meedee Ribbon maintains Oeko-Tex Standard 100 (Class II skin-contact), GRS (Global Recycled Standard for RPET products), Sedex SMETA audit, and ISO 9001:2015 quality management certification. See full scope details.
Home
A Yellow Ribbon Round The Ole Oak Tree
Table of Contents
Summary
As a ribbon expert, I’ll guide you through the art of adorning your tree with beautiful ribbons that will create an elegant and professional look.
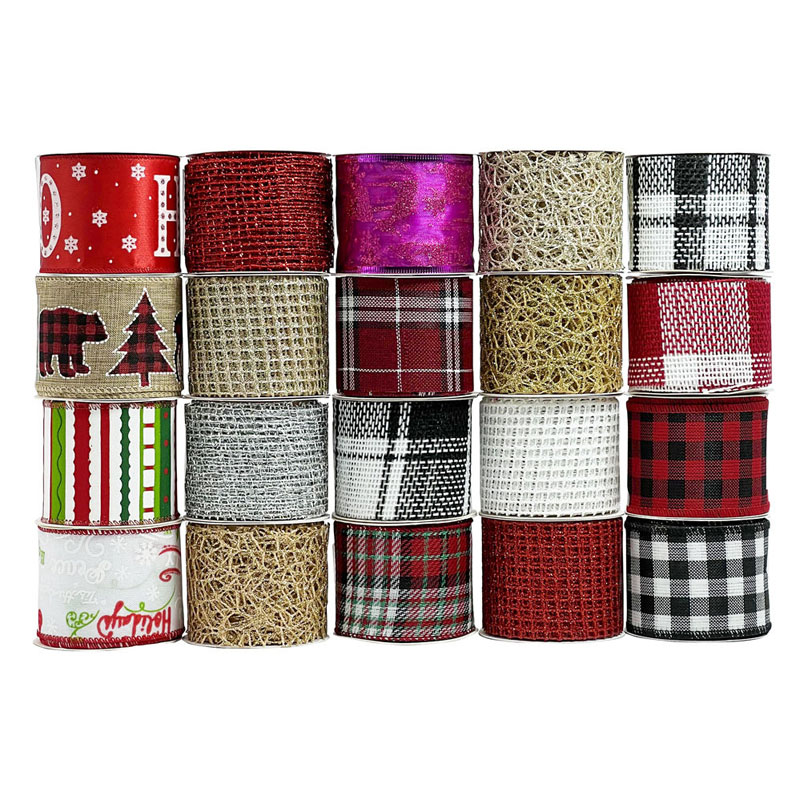
Choosing the Right Ribbon
Selecting the appropriate ribbon is crucial for achieving the desired look. The best options include:
- Wired Ribbons: These are ideal as they hold their shape and are easy to manipulate
- Width: 2.5-4 inches works best for most trees
- Length: Plan for about 12-15 feet of ribbon per foot of tree height
- Material: Velvet, mesh, or burlap for traditional looks
- Colors: Choose 2-3 complementary colors that match your theme
Pro tip: Wired ribbon is essential for creating perfect loops and cascades that stay in place.
Before starting, gather these supplies:
- Wired ribbon (multiple rolls)
- Sharp scissors
- Wire cutters
- Floral wire or pipe cleaners
- Step ladder
- Work gloves (optional)
Basic Ribbon Techniques
There are several popular methods for adding ribbon to your tree:
- Cascading Method
- Start from the top
- Create loose loops
- Work diagonally downward
- Tuck ends into branches
- Wrapped Method
- Begin at the bottom
- Spiral upward around the tree
- Keep tension consistent
- Secure at regular intervals
- Tucked Method
- Push ribbon into tree
- Create poofs between tucks
- Work in sections
- Maintain rhythm
Step-by-Step Guide to Cascading Ribbon
- Preparation
- Fluff tree branches thoroughly
- Light the tree (if using lights)
- Plan ribbon placement
- Starting Point
- Begin at the top
- Leave 6-8 inches for securing
- Create first loop
- Creating Loops
- Make 8-12 inch loops
- Vary sizes slightly
- Secure to branches
- Maintain natural flow
- Securing the Ribbon
- Twist wire around branch
- Hide attachment points
- Check stability
- Adjust as needed
The Wrapped Method Detailed Instructions
- Bottom Start
- Secure end at trunk
- Create first wrap
- Maintain loose tension
- Wrapping Process
- Work clockwise
- Keep spacing even
- Adjust for branches
- Create subtle waves
- Finishing Touches
- Secure top portion
- Hide ends neatly
- Check overall look
- Make adjustments
Advanced Ribbon Techniques

Tips for Professional Results
- Work in good lighting
- Stand back frequently to check progress
- Use Special Occasion Ribbons for unique effects
- Coordinate with other decorations
- Keep ribbon tension consistent
-
Common Mistakes to Avoid
- Using Too Much Ribbon
- Can overwhelm the tree
- Makes other decorations invisible
- Wastes material
- Creates cluttered look
- Poor Planning
- Uneven distribution
- Running out of ribbon
- Inconsistent pattern
- Visible attachment points
Maintaining Your Ribbon Decoration
- Adjust daily as needed
- Store carefully after holidays
- Clean gently if required
- Replace damaged sections
Creative Variations
- Vertical Ribbons
- Drop straight down
- Space evenly
- Secure top and bottom
- Add subtle waves
- Criss-Cross Pattern
- Create diamond shapes
- Overlap consistently
- Secure at intersections
- Balance throughout
Storage and Care
-
Proper storage ensures your ribbons last multiple seasons:
- Roll carefully
- Store in cool, dry place
- Avoid crushing
- Label for next year
Troubleshooting Common Issues
- Sagging Ribbon
- Add more attachment points
- Check wire integrity
- Adjust tension
- Reinforce weak spots
- Visible Gaps
- Fill with smaller loops
- Adjust spacing
- Add complementary ribbons
- Rework problem areas
Frequently Asked Questions
How much ribbon do I need for a 7-foot Christmas tree?
Plan for approximately 84-105 feet of ribbon to ensure adequate coverage and design flexibility.
What type of ribbon works best for Christmas trees?
Wired Christmas ribbon is ideal as it holds shape and is easy to manipulate.
Can I use multiple ribbon colors on one tree?
Yes, using 2-3 complementary colors creates visual interest and depth.
How do I prevent ribbon from slipping off branches?
Use floral wire or pipe cleaners to secure ribbon at regular intervals.
Plan for approximately 84-105 feet of ribbon to ensure adequate coverage and design flexibility.
Wired Christmas ribbon is ideal as it holds shape and is easy to manipulate.
Yes, using 2-3 complementary colors creates visual interest and depth.
Use floral wire or pipe cleaners to secure ribbon at regular intervals.
Conclusion
Mastering the art of putting ribbon on a Christmas tree takes practice and patience. By following these comprehensive guidelines and using quality materials like our Christmas tree decorative wired ribbon, you can create a professionally decorated tree that becomes the centerpiece of your holiday décor. Remember to take your time, plan your design, and enjoy the creative process of bringing your vision to life.
Comments
Learn the latest trends and knowledge about the ribbon business from MEEDEE Ribbon, a ribbon manufacturer in Xiamen, China.
Key facts: 20+ years of OEM and ODM ribbon manufacturing | Xiamen, China | 9 ribbon families | 3–100 mm widths | OEKO-TEX Standard 100, GRS and ISO 9001 certifications plus a Sedex SMETA audit
Related Resources

 EN
EN  FR
FR  DE
DE  KO
KO  ES
ES  SV
SV  AR
AR  DA
DA  CS
CS  IT
IT  JA
JA  TR
TR  PT
PT  NL
NL  PL
PL  FI
FI